Your Ip : 42.202.16.31Your Location : , Your Status : Unprotected

Apple Open VPN

How to setup OpenVPN on MacOS

Step 01.

Minimize or suspend any running applications, and activate your main desktop, or ‘Finder’. Locate the application dock at the bottom of your screen, and activate the ‘Safari’ icon (or your favorite web browser) to continue to the next step.

Step 02.

Now, open Tunnelblick. Within the Tunnelblick home page, look for the navigation bar, and click the ‘Downloads’ link. Click on the link for the latest stable or beta release for your specific operating system version. You can find your Mac OS X version by going to the Apple Menu in the top left and clicking ‘About This Mac’, your version will be display under the OS X heading.

Step 03.

To begin the download click the heading for either the stable or the beta release that is compatible with your version of OS X. Then look for the ‘Downloads’ dialog, with the progress indicated below the newly added file. Once the download completes, find the downloaded item in the ‘Downloads’ dialog, and double-click to continue to the next step.

Step 04.

At this point, the Tunnelblick download should have been mounted as a disk, and the root directory focused in Finder. Next, execute the Tunnelblick installer by clicking the labeled icon below the words, ‘Double-click to begin’, and move to the next step.

Step 05.

Depending on your system security settings, the dialogs below may appear upon execution of the ‘Tunneblick’ installer. Confirm your decision to begin the installation by clicking the ‘Open’ button.

Step 06.

Following your selection, you will be prompted for Administrator credentials – enter the ‘Name’ and the password associated with that account, then click the ‘OK’ button to continue to the next step.

Step 07.

When the installer completes, the dialog below featuring the title, ‘Installation succeeded’. You may choose to launch the newly installed application by clicking the ‘Launch’ button. Verify that you want to open the file by clicking the ‘Open’ button and continue to the next step.

Step 08.

Download the covermevpn’s configuration files that is applicable to your subscription as below links:

Dynamic VPN Configuration file.

Mini Dynamic VPN Configuration file.

For Dedicated VPN unique IP has been sent to you with VPN account details after your payments.

Then go to your Downloads folder and double click the ovpn dynamic.zip (for Example, it may differ) to unzip the file. It contains single sample host/server (here it’s Italy1.ovpn)

Note: it contains README.txt with help of it you can replace other servers from server list link inside and modify .ovpn as per need

Step 09.

Click once on the ovpn dynamic folder to highlight it and then once more on the name config to edit the folder name. Then select at the end of configs and add .tblk to the end of it and click enter. You will see a pop up asking if you are sure click ‘Add’.

Step 10.

Double click ovpn dynamic.tblk there will be a pop-up asking if you want to install for all users, click the check box to ‘Apply To All’ and then select ‘Only Me’.

Step 11.

You will be asked to enter your system administrator’s credentials and password. Once entered click on OK and continue.

Step 12.

You will get a notification telling you when the configuration files have been added to Tunnelblick, click OK.

Step 13.

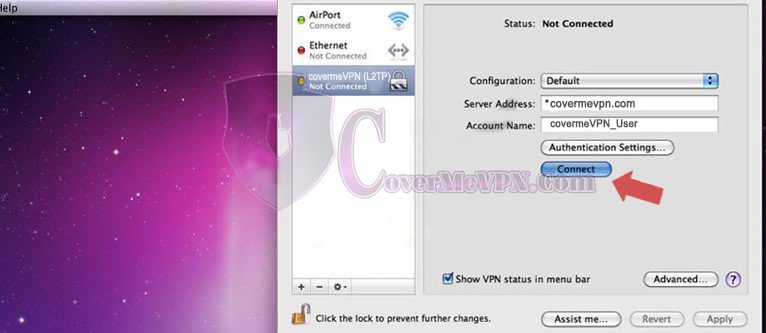
You will now see the Tunnelblick icon at the top right of your screen, click on the icon and select the VPNSHazam’s location/server/host you wish to connect to.

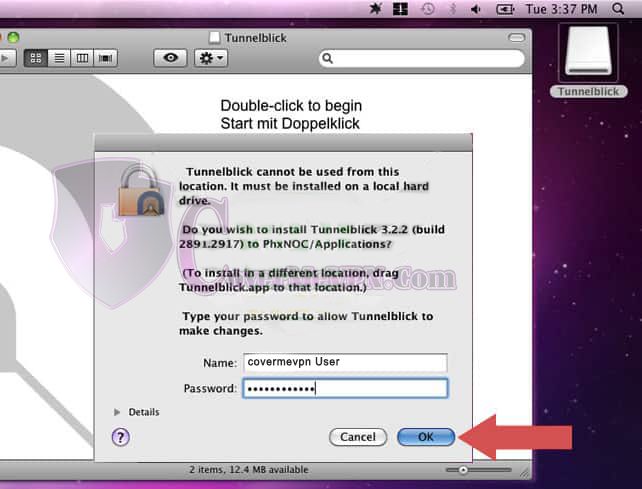
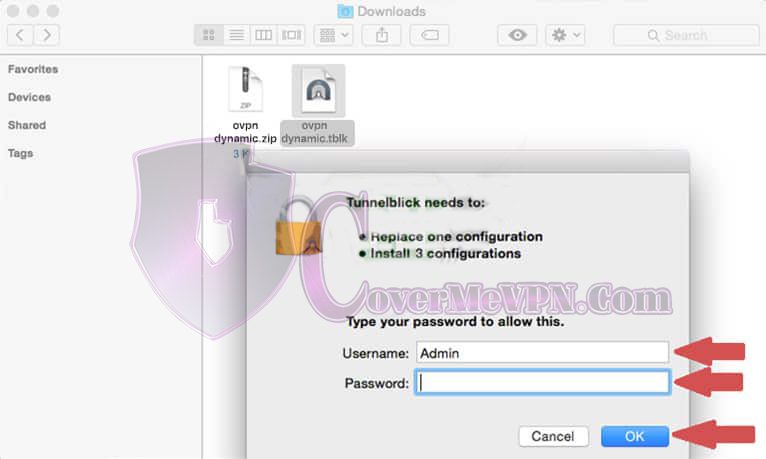
You will again be prompted for credentials, however this time, VPNShazam credentials are requested by Tunnelblick. Enter your username and password EXACTLY as you provided to you if a single letter is miscapitalized, you will receive an error message. If you wish to save your credentials, tick the checkbox labeled ‘Save in Keychain’. Once you are finished, click the ‘OK’ button to continue. You will need to enter these login credentials for each location you wish to connect to.

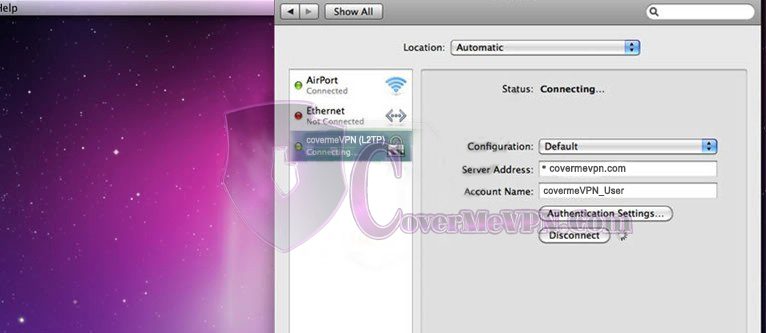
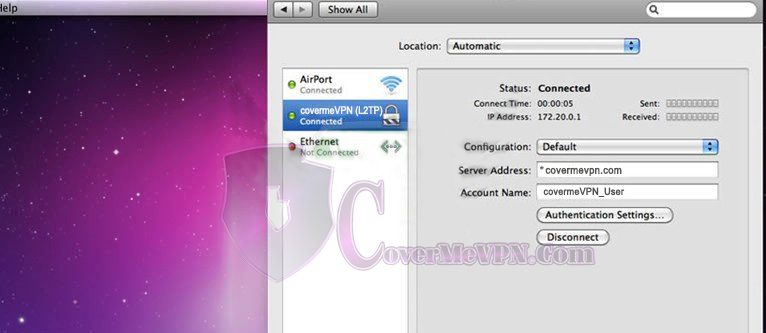
If you have the ‘Growl’ notification system installed to your Mac, you may see notification messages appear near the Tunnelblick icon in the upper-right corner of your screen. Look for the ‘Connected’ messages once the tunnel has been successfully initialized. If you noticed any error or warning messages, please record them and contact our support team for further assistance. Verify the connection by checking your email, or by browsing to your favorite website and have assurance that your online activities are shielded from prying eyes. If later on you wish to switch to a different location or disconnect from VPNShazam simply click on the Tunnelblick icon and select disconnect.

Step 14.

Test your newly created connection by clicking the ‘Connect’ button, just below the ‘Authentication Settings…’ button, and move on to the next step.

Step 15.

As the session to our server opens, watch the ‘Status:’ indicator at the top of the pane for any error or warning messages. If you are unable to obtain the ‘Status: Connected’ message, first confirm that you have entered your username and password – if you are still unable to connect, feel free to contact our support team, and include any relevant status messages.

Step 16.

Once the session has successfully connected, look for the ‘Status: Connected’ message with the ‘Connection Time:’ and ‘IP Address’ details below.

Step 17.

For a quick way to access your VPN session, locate the the indicator on the top of the screen – look for the session ‘Connect Time:’ indicator, and click to open a context menu. From this menu, you quickly start and stop your VPN session without navigating though the ‘System Preferences’ menu. Click out of the context menu, close the ‘System Preferences’ menu, and enjoy peace of mind that your online activities aren’t being monitored by prying eyes.

arrow up