Linux SSTP VPN setup on your Ubuntu system with CoverMeVPN is a cool way to boost your online privacy and access restricted content. This guide will take you through the simple steps to configure your Linux device to connect to CoverMeVPN using SSTP. Whether you want to protect your data on public Wi-Fi or get around geo-restrictions, this setup ensures that your internet traffic remains encrypted and private. Just follow this guide to enjoy a secure and unrestricted browsing experience with CoverMeVPN on your Linux Ubuntu system.
Right click on libsstp-client0_1.0.9_i386.deb and open with “Ubuntu Software Center“
Click on “install” to continue
Provide you Ubuntu password and click on “Authenticate” to continue
Once installed. Go back to downloads folder
Right click on sstp-client_1.0.9_i386 and open with “Ubuntu Software Center“
Click on “install” to continue
Once installed. Go back to downloads folder
Right click on network-manager-sstp_0.9.4-0ubuntu2_i386.deb and open with “Ubuntu Software Center“
Click on “install” to continue
Once installed. Go back to downloads folder
Right click on network-manager-sstp-gnome_0.9.4-0ubuntu2_i386.deb and open with “Ubuntu Software Center“
Click on “install” to continue
Once installed. Go back to downloads folderCenter”
* After installing packages. Reboot your system.
Linux SSTP VPN Setup - Part 02
Linux Ubuntu SSTP VPN Setup - Step 01
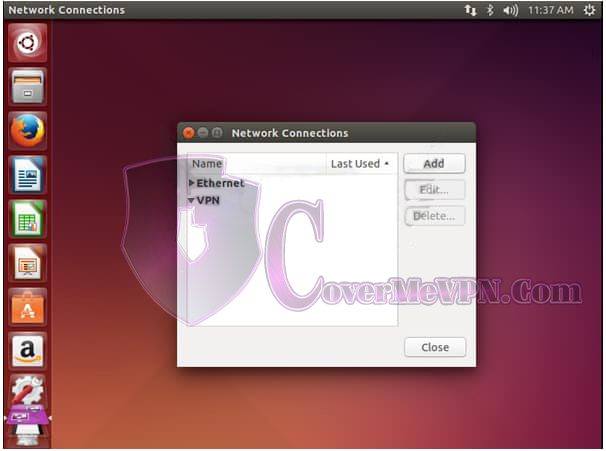
Click on “Network Manager Icon“ and Go to “VPN Connections” and select “Configure VPN…“
Linux Ubuntu SSTP VPN Setup - Step 02
Click on “Add”.
Linux Ubuntu SSTP VPN Setup - Step 03
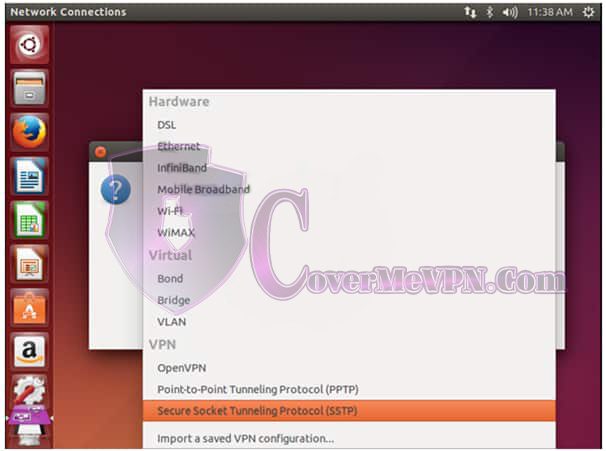
Click on drop down menu.
Linux Ubuntu SSTP VPN Setup - Step 04
Select “Secure Socket Tunneling Protocol (SSTP)” and click “Create”
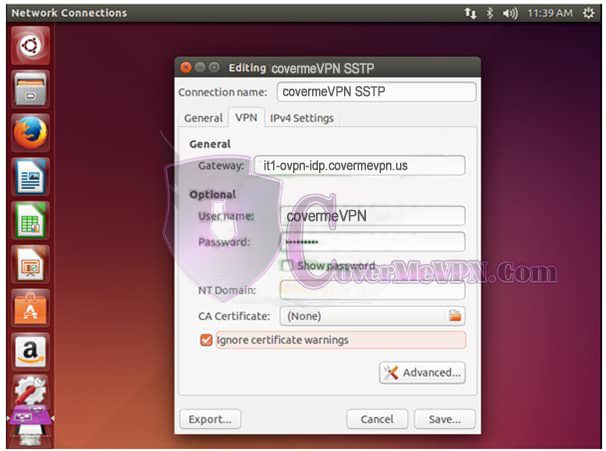
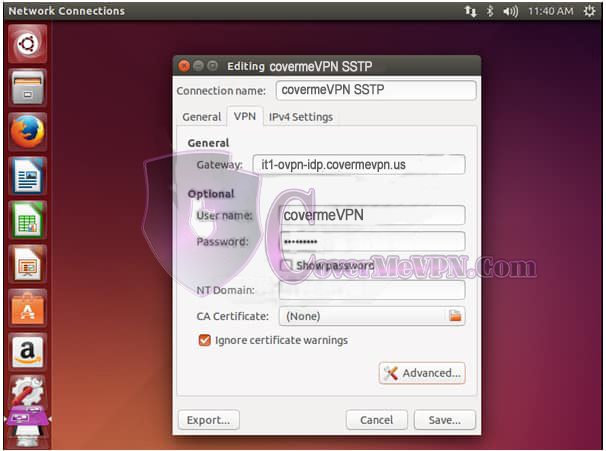
Linux SSTP VPN Setup - Step 05
Do the following:
Insert Connection Name “covermevpnSSTP”
Insert desired Gateway. For the ‘Server address’ field, fill in the server IP from our Dynamic VPN and Chines list or Mini Dynamic (dedicated IP VPN check our mail to you) according to your purchased package that you would like to connect.
Insert Username provided by covermevpn
Insert Password provided by covermevpn
Check “Ignore certificate warnings”
Click on “Advanced”.
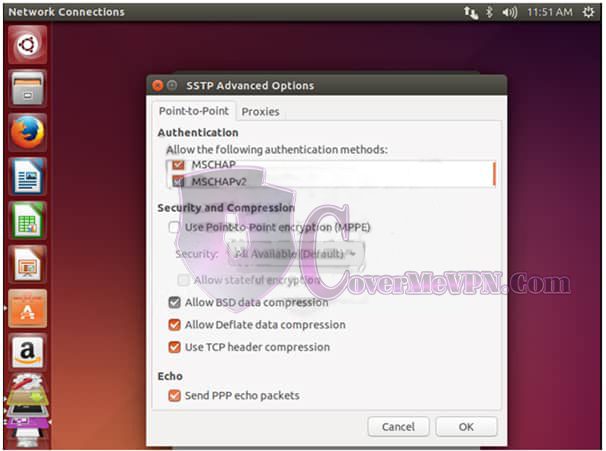
Linux SSTP VPN Setup - Step 06
Do the following:
Uncheck “Use Point-to-Point encryption (MPPE)”
Check following options:
Allow BSD Data compression
Allow Deflate data compression
Use TCP header compression
Send PPP echo packets
Click on “OK”.
Linux SSTP VPN Setup - Step 07
Click on “Save” and close the “Network connections” window.
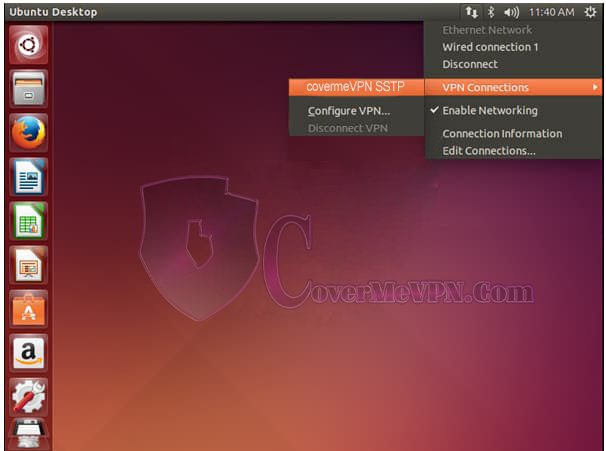
Linux SSTP VPN Setup - Step 08
Click on “Network Connection Icon”
Go to VPN Connections and select Newly created “VPNShazam SSTP” connection.