Your Ip : 3.15.1.100, 172.69.6.102Your Location : , Your Status : Unprotected

About us

It takes more than a private internet browser to go incognito. We’ll make your real IP address.

Your IP Address:

  • 3.15.1.100, 172.69.6.102

Your Location:

  • ,

Your Status:

Unprotected

Get In Touch

Follow Us On:

Windows 10 L2TP VPN Setup Guide

Windows 10 L2TP VPN Setup Tutorial

Want to set up L2TP on your Windows 10 device? It’s easy! Windows 10 L2TP VPN setup with CoverMeVPN is an easy way to enhance your online privacy and access restricted content. With CoverMeVPN’s L2TP protocol, you’ll get top-notch encryption and reliable performance to keep your data safe and access global content seamlessly. Whether you’re on public Wi-Fi or just want to browse privately, this setup will make sure you’re covered.

Windows 10 L2TP VPN Setup - Step 01

Hit the windows key and type ‘vpn’ and hit enter.

Windows 10 L2TP VPN Setup

Windows 10 L2TP VPN Setup - Step 02

“Add a VPN connection” in the Network & Internet Settings window

Windows 10 L2TP VPN Setup

Windows 10 L2TP VPN Setup - Step 03

When the “Add a VPN connection” window pops up, fill in the following information:

  • VPN provider: select Windows (built-in) from the drop down
  • Connection Name: type name that you will recognize for the connection (ex. covermevpn US Server)
  • Server name or address: enter the covermevpn For the ‘Server address’ field, fill in the server IP from our Dynamic VPN and Chines list or Mini Dynamic  (dedicated VPN check our mail to you) according to your purchased package that you would like to connect.
  • VPN Type: select the Layer 2 Tunneling Protocol with IPsec (L2TP/IPsec) from the drop down
  • Type of sign-in info: leave the default User name and password
  • User name: type your covermevpn username
  • Password: type your covermevpn password

Remember my sign-in info can be unchecked if you would like to login each time you connect

Windows 10 L2TP VPN Setup - Step 04

Before you connect, you will need to change some advanced settings. Please click the “Change adapter options” button under Related Settings.

Windows 10 L2TP VPN Setup

Windows 10 L2TP VPN Setup - Step 05

Find and right click the VPN connection you created, then click Properties.

Windows 10 L2TP VPN Setup

Windows 10 L2TP VPN Setup - Step 06

Under the Security tab in the Properties window, check “Allow these Protocols” and leave only Microsoft CHAP Version 2 checked. Then click the Advanced Settings button under the Type of VPN drop-down list at the top.

Windows 10 L2TP VPN Setup

Windows 10 L2TP VPN Setup - Step 07

When the Advanced Properties window pops up check the Use preshared key for authentication then type ‘12345678’ for the Key. Then click OK on the Advanced Properties and the connection Properties windows.

Windows 10 L2TP VPN Setup

Windows 10 L2TP VPN Setup - Step 08

Click the connect button on the VPN you created, after which you should be connected. If you run into any issues, please contact support though our support center.

Windows 10 L2TP VPN Setup

Windows 10 L2TP VPN Setup - Step 09

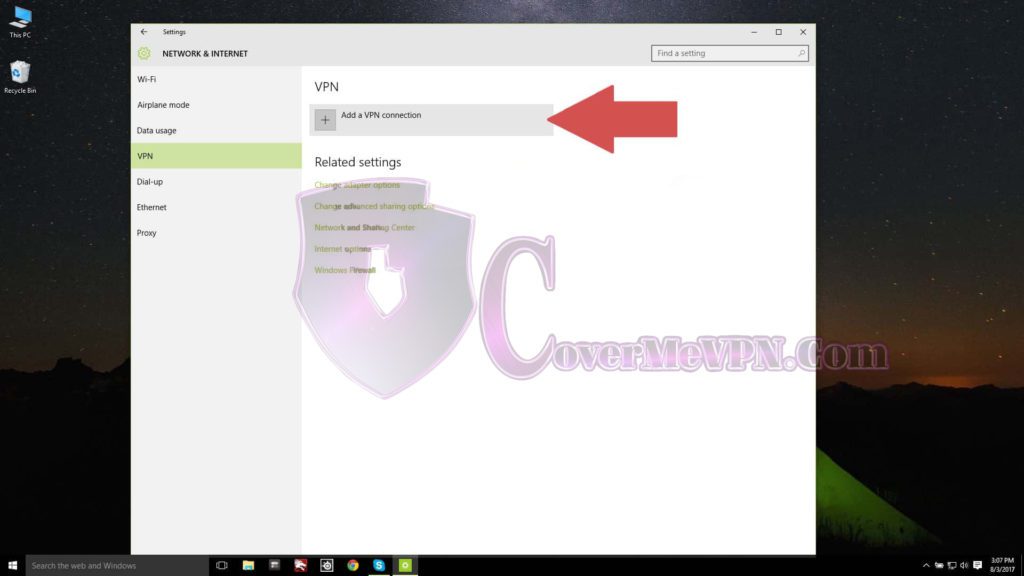
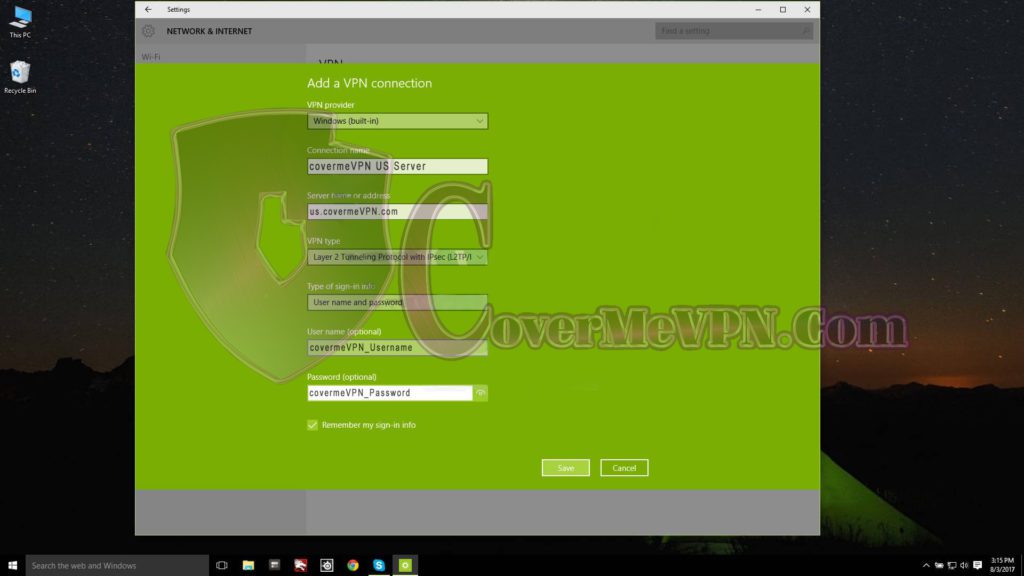
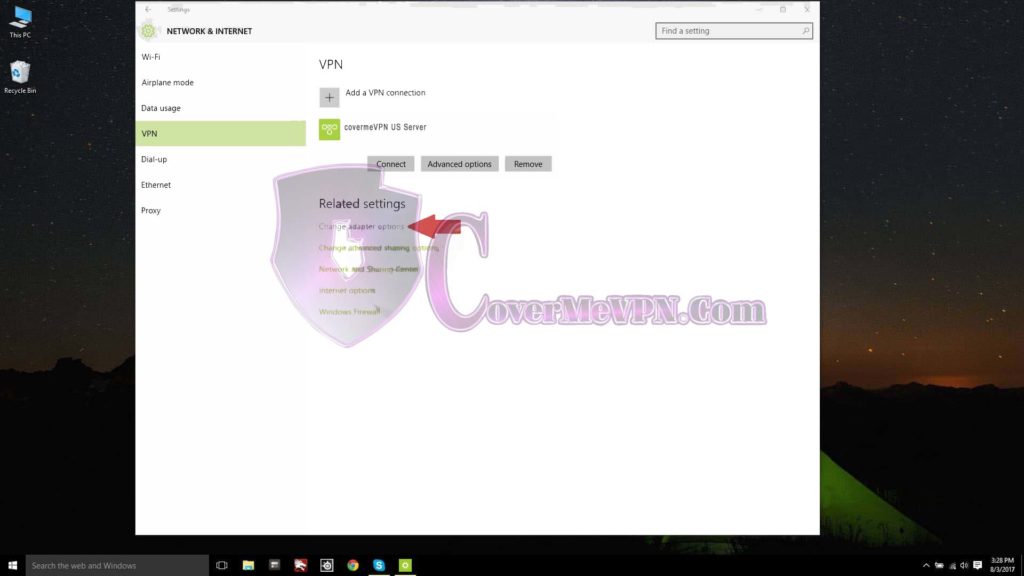
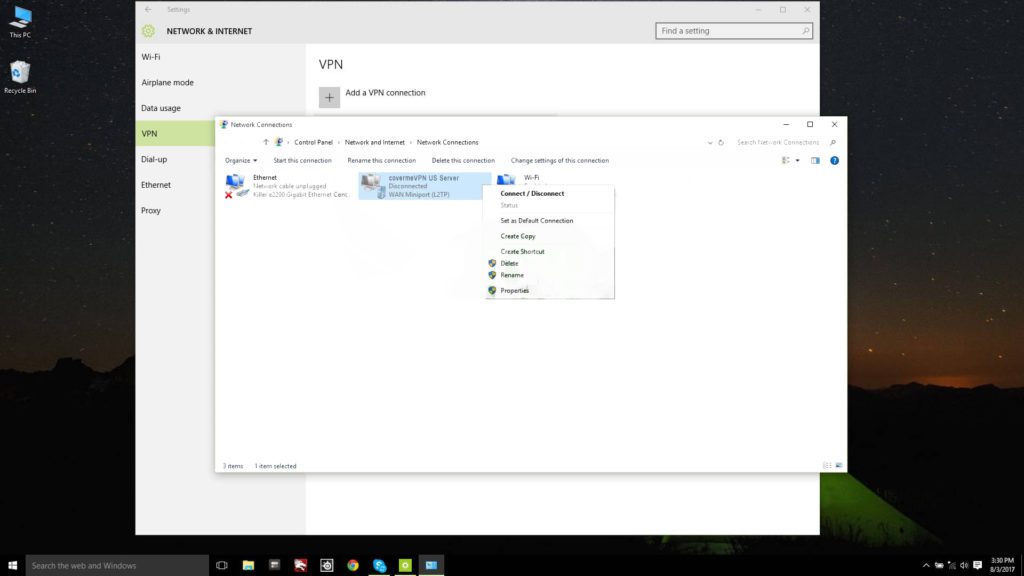
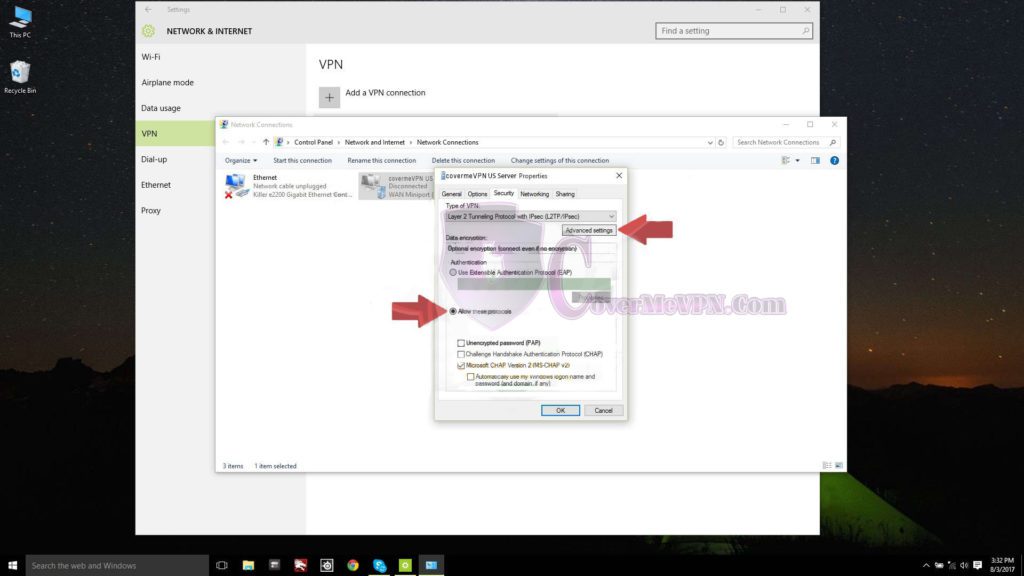
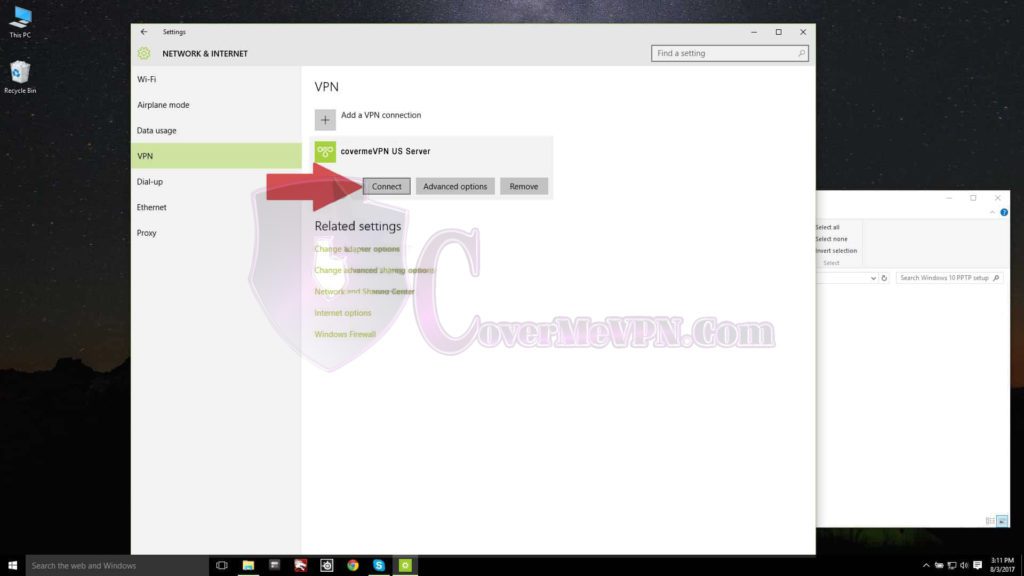
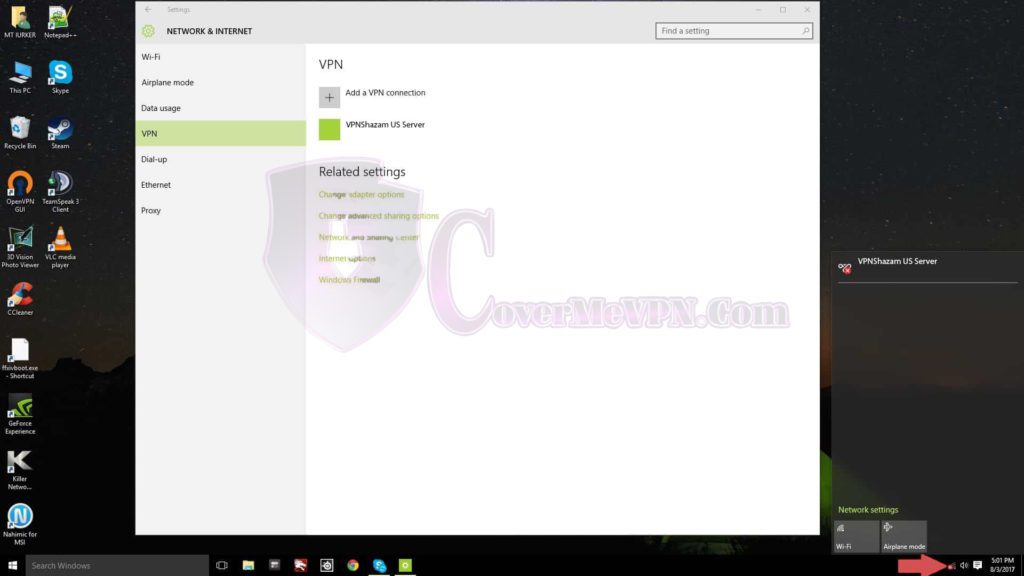
Once you have the VPN connection set up, you can connect by either clicking the Windows key and typing VPN to bring up the Network and Internet page where your VPN connections are listed. You can then click the connect button to begin the connection process. The other option is to click your connection status icon down at the bottom-right of your taskbar, then clicking the VPN of your choice. The VPN window will pop up and as before you can click the VPN you want to connect to and hit the connect button.

Windows 10 L2TP VPN Setup
Download the CoverMeVPN mobile app for iOS or Android.

Copyright © 2024. All Rights Reserved. CoverMeVPN

arrow up