Your Ip : 52.230.152.33Your Location : , Your Status : Unprotected

Windows Hotspot

Manually setup WiFi VPN Hotspot

To turn on your device as a WIFI VPN hotspot which supports OpenVPN, L2TP, SSTP and PPTP protocol, Please make sure that you have that:

Valid internet connection.
Windows OS device.
Bought VPNShazam VPN account (if not, click here)

Connecting many device over one VPN Wifi hotspot would be really helpful.

Step 01.

After connecting ethernet cable to your device, click on start button and type cmd in search bar.

Then right click on cmd and Run as Administrator.

Step 02.

Now in Command Prompt, type/paste netsh wlan show drivers and Press Enter.

Step 03.

Details of wireless network connection will be shown up and you just need to check Hosted network supported : Yes than you are good to go further.

Step 04.

Now type/paste netsh wlan set hostednetwork mode=allow ssid=vpnshazam key=password and press EnterNow it will create WiFi Network. (ssid=anyname key=anypassword)

Step 04.

Now type/paste netsh wlan set hostednetwork mode=allow ssid=vpnshazam key=password and press EnterNow it will create WiFi Network. (ssid=anyname key=anypassword)

Step 05.

Type/paste netsh wlan start hostednetwork to start WiFi network.

Note if you get this “The hosted network couldn’t be started.” error then go to your Network and sharing center and enable newly created “Microsoft Virtual Wifi Miniport Adapter” and try again.

Step 06.

Note Windows 10 users, needs to ignore below step and proceed to next.

Now right click on VPNShazam Icon go to properties > Click on Sharing tab > Select “Allow Other Network User to connect through this computer’s Internet connection”, select your newly created “Microsoft Virtual Wifi Miniport Adapter (Wireless network connection)” from drop down menu and select “Allow other network users to control or disable the shared Internet connection”. Click OK and it is done.

Now connect with VPNShazam.

Step 06.

Note Windows 10 users, needs to ignore below step and proceed to next.

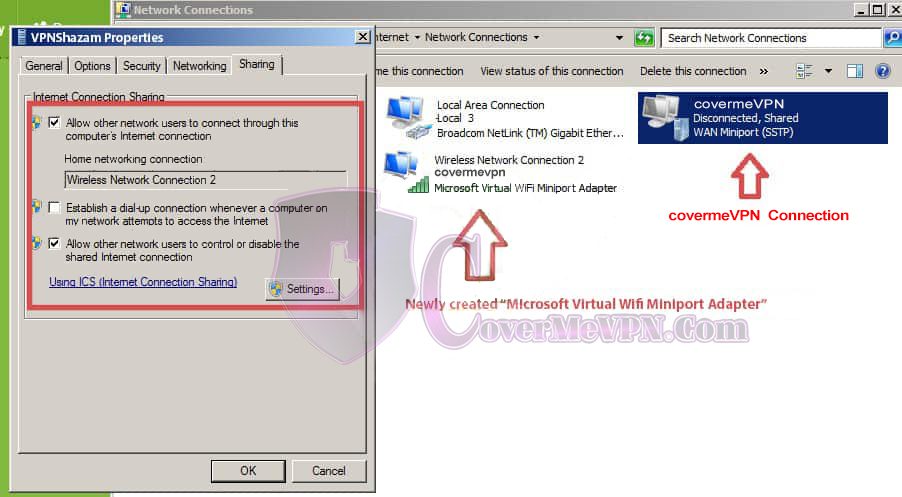
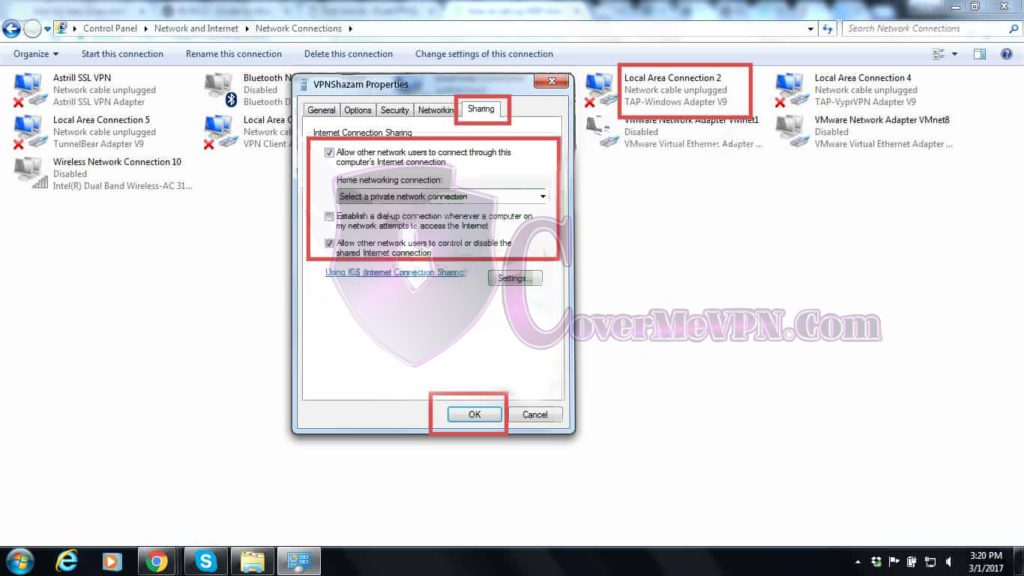
Now right click on covermevpn Icon go to properties > Click on Sharing tab > Select “Allow Other Network User to connect through this computer’s Internet connection”, select your newly created “Microsoft Virtual Wifi Miniport Adapter (Wireless network connection)” from drop down menu and select “Allow other network users to control or disable the shared Internet connection”. Click OK and it is done.

Now connect with covermevpn.

Step 07.

Now Windows 10 Users

Now right click on ‘TAP Windows Adapter V9’ then go to properties > Click on Sharing tab > Select “Allow Other Network User to connect through this computer’s Internet connection”, select your newly created “Microsoft Virtual Wifi Miniport Adapter (Wireless network connection)” from drop down menu and select “Allow other network users to control or disable the shared Internet connection”. Click OK and it is done.

Now connect with covermevpn (You may connect with TCP or UDP protocol).

arrow up